Table of Contents
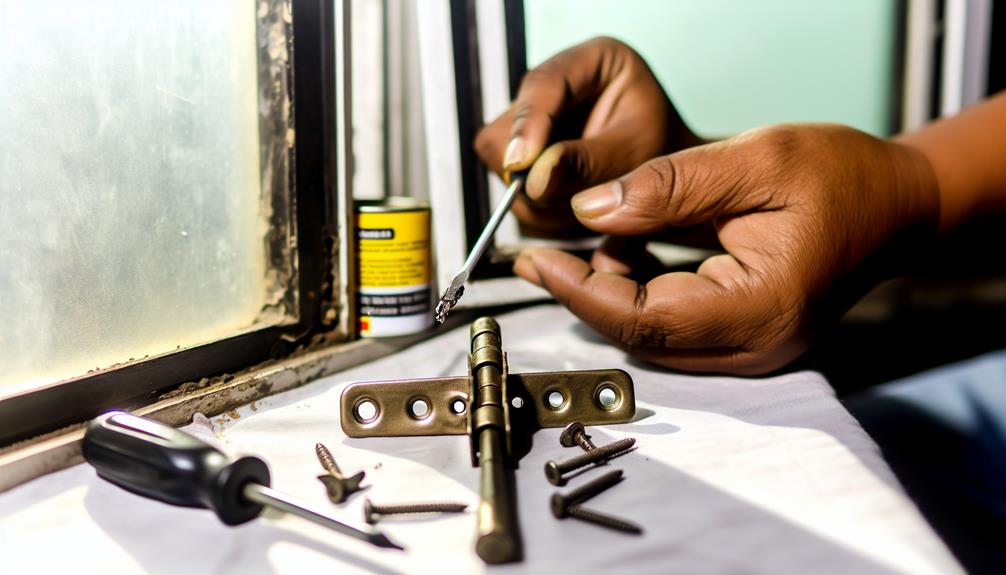
To refresh your casement window hinges, start by gathering the necessary tools, such as a screwdriver, pliers, and lubricant. First, clear and organize your workspace to enhance efficiency.
Next, clean the hinges using a gentle solution to remove dirt and rust. Afterward, apply the appropriate lubricant to minimize friction. Inspect each hinge for any signs of wear or corrosion, and address any issues promptly.
Once everything is clean and lubricated, reassemble the hinges, making sure they are aligned and secure. By following these steps, you’ll restore your hinges to optimal function. There’s plenty more to discover about maintaining and improving your window hinges, so keep going!
Key Takeaways
- Begin by cleaning the hinges with a mixture of soap and water to remove dirt and grime buildup.
- Inspect for rust, corrosion, or loose screws, addressing any issues immediately to prevent further damage.
- Apply a suitable lubricant, like silicone spray or lithium grease, to ensure smooth operation of the hinges.
- If necessary, repaint the hinges with durable exterior paint for added protection against the elements.
Importance of Hinges Maintenance
Maintaining your casement window hinges is essential for guaranteeing smooth operation and preventing costly repairs down the line. Regular maintenance not only enhances the functionality of your windows but also contributes to hinge longevity. When you neglect your hinges, dirt, grime, and rust can accumulate, leading to stiff operation and potential failures.
To keep your hinges in peak condition, establish a maintenance schedule. It doesn’t have to be complicated—just a few minutes every few months can make all the difference. Start by inspecting the hinges for any signs of wear or corrosion. If you notice any issues, address them immediately to prevent further damage.
Lubricating the hinges with a suitable lubricant will help reduce friction and guarantee they operate smoothly. Remember to wipe away any excess lubricant to avoid attracting dust and dirt.
Tools and Materials Needed
To successfully revitalize your casement window hinges, you’ll need a few essential tools and materials.
Start by gathering items like a screwdriver, pliers, and lubricant, as well as any recommended replacement parts.
Having the right gear on hand will make the process smoother and more efficient.
Essential Tools Required
Gathering the right tools and materials is essential for effectively revitalizing your casement window hinges. You’ll want to start with a few basic hand tools: a screwdriver set that includes both flathead and Phillips head options, pliers, and a utility knife. Depending on your specific hinge types, you may need a wrench or socket set to remove the existing hardware.
In addition to tools, having the right materials on hand is vital. A high-quality lubricant, like silicone spray or graphite powder, will help maintain your hinges and reduce friction. If you notice any rust or corrosion, consider using sandpaper or a wire brush to clean the affected areas before applying lubricant.
Don’t forget safety equipment, too! A pair of safety goggles and gloves will protect you during the maintenance process, especially if you’re working with older, more fragile hinges.
Recommended Replacement Parts
When it comes to revitalizing casement window hinges, having quality replacement parts on hand can make all the difference in guaranteeing smooth operation and longevity.
To start, identify the specific hinge types your windows require. Common options include standard, heavy-duty, and concealed hinges. Make certain to choose the right type based on your window design and weight.
Next, consider your replacement options. You can go for OEM (Original Equipment Manufacturer) parts, which assure compatibility and durability, or aftermarket alternatives, which might offer cost savings. Always check reviews for quality and fit before purchasing.
In addition to hinges, you might need new screws, brackets, or even lubrication grease to guarantee peak performance. Don’t forget to stock up on weather stripping to seal any gaps that may have developed over time.
Before you begin the replacement process, gather all necessary parts. This preparation helps streamline the task and prevents delays.
Preparing the Work Area
Before you start working on your casement window hinges, you need to prepare your workspace.
Clear the area of any clutter and gather all the necessary tools to keep everything organized.
Don’t forget to review your safety precautions checklist to guarantee a safe working environment.
Clear the Workspace
To guarantee a smooth process, clear your workspace of any clutter or obstacles that could hinder your ability to work efficiently. Start by removing any unnecessary items from the area where you’ll be working. This step is vital for effective workspace organization, as a tidy environment allows you to focus better on the task at hand.
Next, arrange your tools and materials in a way that promotes an efficient layout. Place frequently used items within easy reach, while keeping less essential tools at a distance. This setup minimizes movement and maximizes productivity during your project.
If you’re working in a small area, consider using a portable table or workbench. It can provide additional space while also keeping your tools organized. Make certain you have adequate lighting to clearly see what you’re doing; working in dim conditions can lead to mistakes.
Lastly, double-check that the floor area is free of tripping hazards. A clear and organized workspace not only enhances efficiency but also guarantees your safety as you revitalize those casement window hinges. Remember, preparation is key to a successful project!
Gather Necessary Tools
Gather your tools and materials to confirm you’re fully equipped for revitalizing those casement window hinges. Different window styles may require specific hinge types, so identifying what you need is vital. Here’s a quick table to help you visualize your requirements:
| Tool/Material | Purpose | Emotion Evoked |
|---|---|---|
| Screwdriver | Remove old hinges | Empowerment |
| Replacement hinges | Upgrade functionality | Excitement |
| Lubricant | guarantee smooth operation | Satisfaction |
You’ll need a screwdriver, preferably a flathead or Phillips, depending on your hinge screws. Having replacement hinges on hand is essential; they’ll provide the best results for your specific window styles. Don’t forget to grab some lubricant—this will help your newly installed hinges work seamlessly.
Having all your tools ready beforehand not only saves time but also keeps frustration at bay. By being well-prepared, you can focus on the task at hand, making the revitalization process smoother and more enjoyable. Remember, the right tools lead to the best results, so confirm you’re fully equipped before diving into the project!
Safety Precautions Checklist
Making certain your work area is safe and organized is just as important as having the right tools for revitalizing your casement window hinges. Start by clearing the area of any clutter, which can cause accidents. Confirm you have adequate lighting to see what you’re doing clearly.
Before you begin, wear appropriate safety gear, including gloves and safety goggles, to protect yourself from potential hazards. It’s essential to have a first-aid kit nearby, so you can quickly address any minor injuries.
Next, familiarize yourself with emergency procedures for your home. Know the location of emergency exits and how to contact help if something goes wrong. If you’re working on a ladder, make sure it’s stable and positioned correctly to prevent falls.
Cleaning the Hinges
Cleaning the hinges of your casement windows is vital for smooth operation and longevity. Over time, dirt and grime can build up, causing your hinges to work inefficiently. Start by identifying the hinge types on your windows, as this will guide your cleaning approach.
You’ll need effective cleaning solutions. Here’s a quick list to help you get started:
- Soap and Water: A simple solution to remove dirt.
- Vinegar: Great for cutting through grease and grime.
- Baking Soda Paste: Effective for stubborn stains when scrubbed gently.
Begin by applying your chosen cleaning solution to the hinges. Use a soft cloth or brush to gently scrub away any buildup. Be careful not to damage the finish or the hardware.
Rinse with clean water and dry thoroughly. Once the hinges are clean, don’t forget to apply lubricant to guarantee they operate smoothly. By keeping your casement window hinges clean, you promote durability and prevent unnecessary repairs down the line.
Inspecting for Damage
Inspect your casement window hinges regularly for signs of damage, as even small issues can lead to bigger problems down the road.
Start by checking for rust or corrosion, which are common hinge issues that can weaken the structure. Look for any cracks or chips in the hinge material, as these can compromise the hinge’s functionality.
Next, use a hinge inspection checklist to guarantee you don’t miss anything. First, open and close the window to listen for any unusual noises, like squeaking or grinding. These sounds may indicate that the hinges are misaligned or need lubrication. Also, check if the window seals tightly when closed; gaps could suggest that the hinges aren’t supporting the window properly.
Pay attention to the screws securing the hinges. Loose screws can lead to instability, so tighten them if necessary.
Painting Techniques
After addressing any damage to your casement window hinges, it’s time to contemplate the best painting techniques to refresh their appearance and protect them from the elements.
Begin by choosing the right color selection that complements your home’s exterior. This adds aesthetic value and can enhance the overall look of your windows.
Next, consider the different paint types available. Opt for a durable exterior paint that withstands weather conditions.
Here are some tips to guide you through the painting process:
- Clean Thoroughly: Remove any dust and grease from the hinges before painting.
- Prime First: Use a primer suitable for metal surfaces to guarantee better paint adhesion.
- Apply Even Coats: Use a brush or spray for uniform application, letting each coat dry completely.
Lubricating the Hinges
Lubricating your casement window hinges is essential for smooth operation and longevity. Different hinge types require specific lubrication methods to guarantee they function properly. Here’s how you can effectively lubricate your hinges.
Start by identifying the type of hinges you have, as this will dictate your lubrication choice. For example, some hinges may benefit from silicone spray, while others might need a graphite lubricant.
| Hinge Type | Recommended Lubrication Method |
|---|---|
| Standard Hinges | Silicone Spray |
| Heavy-Duty Hinges | Lithium Grease |
| Decorative Hinges | Graphite Lubricant |
To apply the lubricant, first clean the hinge area to remove dust and debris. Then, apply a small amount of your chosen lubricant directly onto the hinge pins. Guarantee you work the lubricant into the mechanism by opening and closing the window several times. This will help distribute the lubricant evenly, enhancing the hinge’s efficiency. Regular maintenance, including lubrication, will keep your casement windows operating smoothly for years to come.
Reassembling and Testing
Once you’ve lubricated the hinges, it’s time to carefully reassemble the window components to guarantee everything fits back together smoothly.
Start by aligning the hinges correctly to make certain the window opens and closes without any issues. Pay close attention to the hinge alignment; misalignment can lead to unnecessary strain on the hinges.
Here’s a quick checklist to help you through the reassembly:
- Secure the hinges: Make sure each hinge is fastened tightly to avoid wobbling.
- Align the window frame: Check that the frame fits snugly against the wall.
- Test the window movement: Open and close the window to confirm it’s operating freely.
After reassembly, testing functionality is essential. Open and close the window several times to make certain it operates smoothly without binding.
If you notice any resistance, disassemble and check the hinge alignment again. Properly reassembling and testing your casement window hinges not only enhances their lifespan but also improves your window’s overall performance.
Conclusion
Revitalizing your casement window hinges not only enhances their functionality but also extends their lifespan.
By following these simple steps—cleaning, inspecting, painting, and lubricating—you’ll guarantee your windows operate smoothly and look great.
Don’t underestimate the importance of regular maintenance; it can save you time and money in the long run.
With a little effort, you can enjoy the benefits of well-maintained hinges, keeping your windows in top condition for years to come.
Leave a Reply